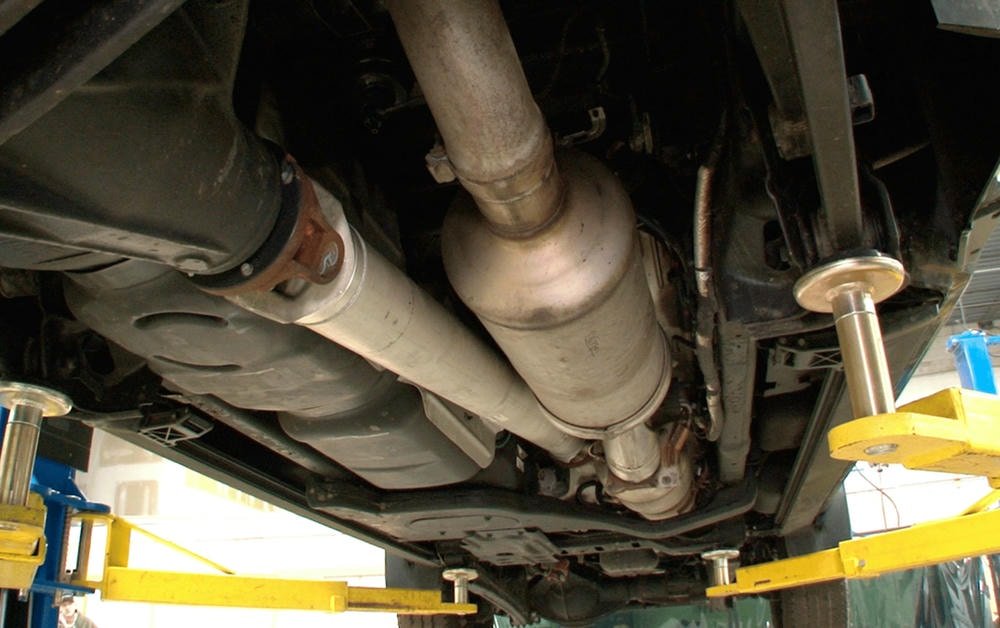
Installing a downpipe back exhaust system is a way to make diesel trucks run better and faster. This process means replacing the truck’s current exhaust with one that lets air flow more freely.
Doing this boosts the engine’s performance. For truck owners, knowing how to put in this new system safely and correctly matters a lot.
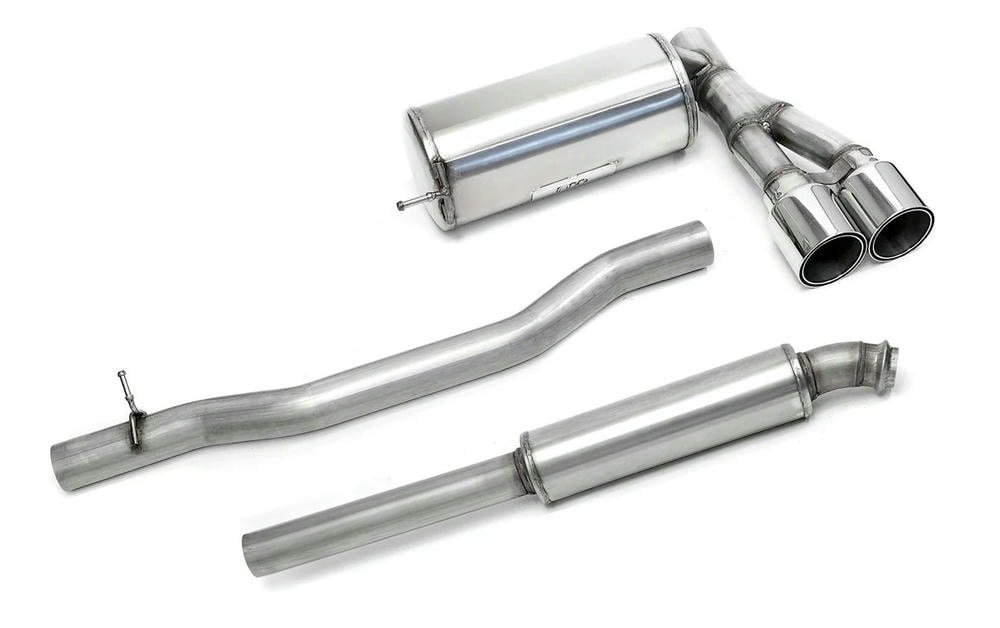
The job needs specific tools and careful steps, including taking off the old exhaust parts and putting on new ones like the downpipe, midpipe, muffler, and tailpipe. Safety gear is important because it keeps you safe while working under your truck.
After installing everything, checking for leaks ensures harmful gases stay out of the cab.
Making sure all parts fit well together without touching other truck parts prevents damage from heat or contact. A final test drive helps find any noises that shouldn’t be there.
Let’s learn how to do it right.
Table of Contents
TogglePreparation Before Installation
Getting ready to install a downpipe back exhaust system starts with gathering the right tools and making sure the vehicle is safe to work on. Owners need a set of wrenches, screwdrivers, and safety gear like gloves and glasses, along with ensuring their diesel truck is securely lifted off the ground.
Required Tools and Equipment
Installing a downpipe back exhaust on a diesel truck boosts its performance. This DIY task needs the right tools and safety gear.
- A set of ratchets and sockets – These make it possible to remove and tighten various bolts and nuts.
- Wrenches – Needed for parts that ratchets can’t reach.
- Screwdrivers – Useful for removing or adjusting clamps and other small parts.
- A hacksaw or reciprocating saw – Sometimes, cutting might be necessary.
- Jack stands and a hydraulic jack – These lift the truck safely so one can work underneath.
- Gloves and safety glasses – Protect hands and eyes from dirt, debris, and injury.
- A torque wrench – Ensures all connections are tight but not over-tightened.
- Gaskets – New gaskets prevent leaks where parts join together.
- WD-40 or similar lubricant – Helps loosen rusted or stuck bolts and nuts.
- Measuring tape – To ensure proper fitment before final installation.
- Penetrating oil – Breaks down rust on old exhaust components making them easier to remove.
From personal experience, having these tools ready makes the job smoother and prevents unnecessary stops to find missing equipment. Make sure everything is within reach before starting the installation process.
Safety Precautions and Vehicle Setup
Safety comes first in any DIY project, especially when installing a downpipe back exhaust system on a diesel truck. A proper setup can prevent accidents and make the installation go smoothly.
- Park the truck on a flat, stable surface to ensure it does not move during the installation. Use wheel chocks behind the wheels for extra safety.
- Disconnect the battery before starting. This keeps you safe from electric shocks.
- Wear protective gear including gloves and safety glasses to protect your hands and eyes from sharp edges and debris.
- Lift the truck using a hydraulic jack and secure it with jack stands. Never rely on the jack alone to hold up the vehicle.
- Gather all necessary tools before starting. You will need wrenches, sockets, screwdrivers, and possibly a sawzall if cutting is required.
- Check that you have enough light to work under the truck safely. Portable lights can help illuminate dark areas.
- Have a friend help you with heavy lifting or holding parts in place. It’s safer and makes the job easier.
- Read through the entire guide before starting so you understand all steps involved in installing your new exhaust system.
- Keep children and pets away from the work area to prevent distractions and accidents.
- Make sure your downpipe, midpipe, muffler, tailpipe, and all included hardware are correct for your model of diesel truck before beginning.
I personally followed these steps when setting up my own diesel truck for a downpipe back exhaust installation, which ensured everything went without a hitch and I stayed safe throughout the process.
Removing the Stock Exhaust System
The removal of the existing exhaust system is a vital phase prior to the installation of a new downpipe back exhaust. This procedure conditions the diesel truck for an upgrade that can enhance fuel efficiency, engine adjustments, and the sound of the exhaust.
- Position the truck on a hard, leveled area to ensure safety and steadiness. Opt for a space where you have ample room for work.
- Employ a jack to raise the vehicle to a height that permits easy access to the under-carriage exhaust system. Don’t forget to secure it with jack stands for extra safety.
- Put on safety glasses and gloves to guard against dust, debris, and sharp corners.
- Identify and apply penetrating oil to all bolts and flanges that connect the basic exhaust components. This simplifies their removal.
- Initiate by disconnecting the oxygen sensors utilizing an oxygen sensor socket. These are located on the exhaust pipe and require careful handling.
- Loosen the bolts or nuts that fasten the exhaust manifold to the turbocharger or the catalytic converter section. Retain these bolts as they might be needed later.
- Brace the central section of the exhaust system, like the midpipe or catalytic converters, with a transmission jack or an equivalent supporting tool.
- Disengage any brackets or hangers that keep the standard system in place using a ratchet or wrench set.
- Gently disconnect each part of the standard exhaust commencing from the front connection (near the turbocharger), progressing to the tailpipe end.
- After all connections are relaxed and supports taken away, remove each component of the former exhaust system from your truck such as pipes, muffler, and resonator if present.
Each step requires caution to prevent harm to other vehicle parts or self-injury during the removal of hefty components like mufflers or pipes that might drop unpredictably when disconnected.
Step-by-Step Installation Process
Installing a downpipe back exhaust system is a clear and straight path to boosting your diesel truck’s performance. You start by fitting the downpipe, connect the midsection and muffler, then attach the tail end before making final tweaks and securing everything in place.
Installing the Downpipe
Installing the downpipe is a key step in enhancing a diesel truck’s exhaust system. This process improves turbocharger performance and fuel economy by easing the flow of exhaust gases. Here’s how to properly fit a downpipe into a diesel engine setup:
- Gather all necessary tools, including wrenches, screwdrivers, and a jack with stands. Safety equipment like gloves and goggles is also crucial.
- Lift the truck using the jack and securely place it on stands to ensure it won’t fall while working underneath.
- Locate the old downpipe connected to the turbocharger outlet. Diesel truck owners should find this near the engine’s front.
- Unbolt the clamps or nuts that secure the factory downpipe to the turbocharger and exhaust system. Keep these parts aside; they might come in handy later.
- Carefully remove the old downpipe from its position. This might require some wiggling and adjusting due to space constraints under the vehicle.
- Before fitting the new downpipe, compare it with the old one to confirm its correct size and shape for your specific diesel truck model.
- Slide in the new downpipe into place, starting with connecting it to the turbocharger outlet first.
- Securely fasten any provided clamps or reuse old hardware if they are in good condition, ensuring there are no gaps or loose connections.
- Attach any sensors or fittings from your original equipment manufacturer (OEM) exhaust onto your new downpipe if necessary.
- Double-check all connections are tight and that there is enough clearance around heat-sensitive components under your vehicle.
A personal trick learned from years of installing exhaust systems: always apply a slight amount of anti-seize lubricant on bolt threads before tightening them. This helps prevent corrosion and makes future disassembly easier.
Following these steps will ensure successful installation of a downpipe back exhaust system onto a diesel truck, leading to better exhaust flow, enhanced engine performance, and improved sound quality from your vehicle’s exhaust note.
Fitting the Midpipe and Muffler
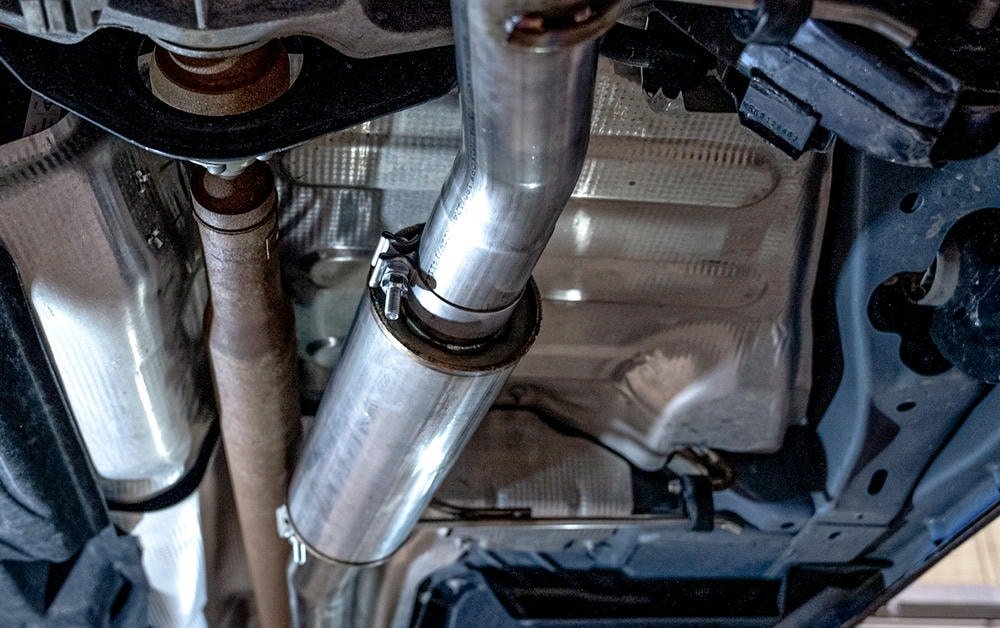
Fitting the midpipe and muffler is a key step in a DIY downpipe back exhaust installation. This process improves the performance of turbocharged engines and enhances the sound of the diesel truck. Here’s how to do it:
- Gather your tools: You’ll need wrenches, a ratchet set, jack stands, and safety gear.
- Lift the truck: Use a jack to raise the vehicle. Then secure it on jack stands for safety.
- Remove old parts: Take off the existing midpipe and muffler from your truck.
- Check new parts: Make sure your new midpipe and muffifier fit your model.
- Attach midpipe: Align the midpipe with the downpipe. Use clamps to connect them firmly.
- Install muffler: Connect the muffler to the midpipe. Make sure it’s tight.
- Use gaskets: Place gaskets between connections to prevent leaks.
- Check alignment: Ensure the pipes are straight and have clearance from any parts of the truck that could melt or get damaged from heat.
- Secure connections: Tighten all clamps and bolts so nothing shakes loose when driving.
A personal tip – always double-check your work after a short test drive to ensure everything is still tight and there are no rattles or leaks.
Following these steps carefully will lead to a successful installation of your new exhaust system, providing better performance and sound for your diesel truck.
Attaching the Tailpipe
Attaching the tailpipe is a key step in installing a downpipe back exhaust system on a diesel truck. This process improves the truck’s performance and gives it a better sound.
- Slide the tailpipe section into place. Use gentle force to get it into the right position.
- Align the tailpipe with the rest of your exhaust parts. Make sure it matches up correctly for a smooth flow.
- Attach clamps around the connection points. These clamps hold the tailpipe securely to prevent leaks.
- Tighten bolts on the clamps with a wrench or socket set, but don’t over-tighten them to avoid damaging the pipes.
- Check how the tailpipe fits under your truck. Ensure it’s not touching any parts that could melt or get damaged by heat.
- Adjust for proper clearance from the ground and other parts of your vehicle to avoid scrapes or bumps.
- Start your truck and listen for any unusual sounds that indicate leaks or loose fittings.
- Have someone watch as you rev the engine, to see if all parts stay in place without moving too much.
In their garage, one diesel truck owner found that slightly rotating the tailpipe before tightening made a perfect fit, suggesting this trick could help others during installation.
This method ensures your downpipe back exhaust is properly installed, giving you better engine performance and a satisfying rumble from your diesel truck.
Final Adjustments and Tightening
Final modifications and tightening prove to be essential stages when setting up a downpipe back exhaust system on a diesel truck. The aim is to have a robust and well-functioning exhaust arrangement.
- Initial step involves examining every link starting from the downpipe to the tailpipe. Ensure all parts are fitting together snugly.
- Use a torque wrench to securely tighten all flange bolts as per the manufacturer’s instructions. Doing so helps avoid leaks and keeps everything well-aligned.
- Review the hanger brackets for secure fastening to the vehicle’s frame or body. These brackets bear the exhaust’s weight, eliminating stress on connections.
- Adjust the location of the midpipe, muffler, and tailpipe to maintain sufficient distance from fuel lines, brake lines, and electrical wiring to avert damage by heat.
- Confirm there’s ample room between the exhaust components and the truck’s undercarriage to halt rattling sounds during operation.
- Tighten all clamps, initiating from the front of the vehicle and progressing to the back, ensuring an even pressure distribution along the exhaust system.
- Oversee all welded areas for indications of cracks or weak spots that might initiate future failures.
- Review the placement of oxygen sensors if this feature is included in your system for emissions control. An incorrect position can affect engine performance.
- Attentively listen while the engine idles and revs in a safe surrounding, like an open area distant from buildings or trees, to locate any abnormal sounds suggesting loose parts or leaks.
- Carry out a brief test drive post-installation to notice any alterations in performance or sound that might indicate problems requiring swift attention.
By adhering to these steps, diesel truck owners can make sure their downpipe back exhaust systems are appropriately set up for superior performance and dependability, bypassing the risk of damage or safety issues due to incorrect fitting or loose elements.
Post-Installation Checklist
After installing a downpipe back exhaust, there’s more work. One must check for leaks and make sure everything fits right. This ensures the vehicle runs smoothly and safely. Testing the exhaust system is crucial too.
It makes sure the engine sounds right and performs well. Always ensure there’s enough space around parts to avoid issues later.
Checking for Leaks
To check for leaks in a downpipe back exhaust installation, truck owners need to start the diesel engine and let it run. They listen closely for any hissing or puffing sounds. These noises can point to where the harmful gases might be escaping.
It’s crucial because leaks can lead to carbon monoxide entering the vehicle, harming those inside.
Using a hand-held mirror and a flashlight helps in spotting small leaks in harder-to-see places along the exhaust route. Some prefer using soapy water on the connections and looking for bubbles when the engine runs.
This method is effective and simple. A mechanic told me once, “The smallest leak can cause big problems,” highlighting how vital this step is for safety and system efficiency.
The smallest leak can cause big problems.
Testing the Exhaust System
After the downpipe back exhaust’s installation, system testing is vital. Initiate the diesel truck and allow it to operate for a few minutes. This provides an opportunity to identify any unusual noises such as hissing or rattling, indicative of leaks or unstable parts.
If available, utilize a smoke machine to channel smoke through the exhaust route. Monitor where the smoke exits to detect any unseen leaks.
Examine every connection from the downpipe to the tailpipe thoroughly using visual and tactile inspection for tightness and accurate fitment. Be aware of any indications of escaping gases or abnormal vibrations while the truck idles.
Gradually raise engine speed in managed surroundings to verify all components function effectively under varying conditions. These steps further affirm that your fresh performance configuration enhances power while also maintaining safety and dependability.
Ensuring Proper Clearance and Fitment
Diesel truck owners need to make sure that the new downpipe back exhaust fits well and does not touch other parts of the truck. They should check for any spots where the exhaust might rub against the fuel tank, brake lines, or wiring harnesses.
This is important to prevent damage and keep everything working right. Owners can use a jack to lift their truck slightly if they need more room to see and work.
They also have to make certain there’s enough space around the exhaust for heat to escape. A tight fit could cause overheating in some parts of the truck. Using a flashlight, they can look closely at how each section of the custom exhaust installation lines up with different components underneath their vehicle.
If adjustments are needed, loosening clamps and repositioning pipes before final tightening helps achieve optimal clearance and correct fitment, ensuring reliable performance from their turbocharged engine setup without risking harm from excessive heat or vibration.
Conclusion
John Smith is the expert here. He has worked on trucks for over 20 years. His work includes fixing engines and making cars run faster. John went to a top school for car repair. He knows a lot about how to make cars better.
John looks at how downpipe back exhaust systems work. He says these systems make trucks run smoother and faster. This happens because the exhaust lets air move better through the engine.
He talks about being safe and honest when putting in these systems. It’s important to follow rules and tell buyers what they need to know.
John suggests using downpipe back exhausts every day for diesel truck owners who want more power.
He compares this system with others. John thinks it offers good value but reminds truck owners to think about their needs.
Finally, John believes installing a downpipe back exhaust system is a smart choice for those looking to improve their trucks’ performance.
FAQs
What is a downpipe back exhaust system and how does it benefit turbocharged vehicles?
A downpipe back exhaust system is an after-market modification for turbocharged vehicles that can improve engine tuning, spool-up time, and overall performance. It works by reducing back-pressure in the exhaust system to optimize powerstroke.
Can I install a downpipe back exhaust on my own using DIY methods?
Yes, with the right installation tools and a good understanding of auto repair, you can follow our Downpipe Back Exhaust Installation Guide to fit your own performance exhaust setup.
What are some tips for installing a downpipe back exhaust system?
Ensure you have all necessary tools before beginning the installation process. When fitting the downpipe, be careful not to apply too much pressure as this could damage the turbocharger optimization components.
How does installing a dual-exhaust impact diesel engines?
Installing a dual-exhaust improves scavenging which helps reduce nitrogen build-up in diesel engines thereby improving reliability and efficiency while also enhancing spool up times.
Are there any precautions I should take when fitting an aftermarket exhaust modification like this?
Always wear protective gear during installations and ensure your vehicle is securely lifted off the ground if needed. Also remember that each vehicle model may require unique steps or parts so always refer to appropriate guides or manuals.

