Installing mufflers and delete pipes on a diesel truck is a key step for owners who want to change their vehicle’s exhaust sound and improve performance. Gathering tools like wrenches and safety gear before starting is crucial.
One must also lift the truck safely and unplug the battery. The process involves removing old exhaust parts by loosening clamps with tools, such as a socket set, and sometimes cutting if they are hard to remove.
For rusted bolts, using penetrating oil helps.
Next comes fitting the new muffler or delete pipe, ensuring it sits right, securing it with clamps, and checking its alignment to prevent leaks or damage. After putting everything in place, one should test for leaks with soapy water or listen for odd sounds.
A test drive will show if there are sound and performance improvements.
If problems pop up, tightening all connections again might fix them. Sometimes aligning parts again or asking an expert can help too.
Ready to learn more? Keep reading!
Table of Contents
TogglePreparation for Installation
Getting ready to install a muffler or delete pipe starts with gathering the right tools and making sure you’re safe. You’ll need things like wrenches, screwdrivers, and eye protection before lifting your truck to start work.
Required Tools and Equipment
Installing mufflers and delete pipes on a diesel truck is a task that owners can do themselves. To start, one needs the right tools and equipment for a smooth installation. Here’s what you’ll need:
- Socket set – This includes various socket sizes to remove and tighten bolts on the exhaust system.
- Wrenches – Adjustable wrenches are necessary for turning nuts that sockets cannot reach.
- Jack stands or vehicle lift – To safely elevate the truck for easy access to the exhaust components.
- Safety equipment – Eye protection and gloves protect from injuries while working under the truck.
- Screwdrivers – Needed for loosening clamps or screws that may be part of the exhaust setup.
- Exhaust hangers – These support the muffler and delete pipe, keeping them aligned.
- Sawzall or metal cutting tool – If cutting is required to remove old exhaust parts or fit new ones, this tool is essential.
- Measuring tape – Helps ensure proper fitment of the new muffler or delete pipe before installation.
- Penetrating oil – Eases the removal of rusty bolts and nuts in the exhaust system.
- Torque wrench – Ensures that all connections are tightened to the manufacturer’s specified torque, avoiding leaks or loose parts.
Using these tools ensures a proper DIY installation of mufflers and delete pipes, enhancing performance exhaust fitting and optimizing engine tuning without professional help.
Safety Precautions
Safety during DIY muffler and delete pipe installation is critical. Diesel truck owners must take certain steps to prevent accidents and injuries.
- Wear protective gear including gloves, safety glasses, and ear protection to keep hands safe, eyes from harmful debris, and ears from loud noises.
- Make sure the vehicle is on flat ground before starting work. This ensures it won’t roll while you are under it.
- Use jack stands to support the vehicle after lifting. Never rely on a jack alone as it could slip or fail.
- Disconnect the battery to prevent any electrical shorts or fires when working on the exhaust system.
- Allow the truck’s exhaust system to cool down completely before touching it to avoid burns.
- Keep a fire extinguisher nearby in case of emergencies. Work in a well-ventilated area to avoid breathing in harmful fumes.
- Check all tools and equipment beforehand to ensure they are in good working condition. Faulty tools can cause injuries or make the job harder than it needs to be.
- Follow instructions carefully for both removing old exhaust components and installing new ones like mufflers or delete pipes. Incorrect installation can lead to dangerous leaks or poor performance.
- Secure all connections tightly with clamps and hardware provided with your new exhaust parts to avoid parts coming loose while driving.
10.Use caution when lifting heavy parts and if possible, have someone assist you during the installation process to reduce strain injuries.
Following these safety measures helps ensure that DIY exhaust mods like fitting custom mufflers and delete pipes are done safely and effectively.
Vehicle Setup and Pre-Installation Checklist
Preparing a diesel truck for muffler and delete pipe installation requires attention to detail and the right setup. Owners must ensure they have all necessary items before starting this task. Here’s what to do:
- Gather tools and equipment needed for the job. This includes wrenches, screwdrivers, a jack, and jack stands.
- Put on safety gear like gloves and goggles to protect eyes and hands from sharp edges and debris.
- Park the truck on a level surface to ensure stability while working underneath it.
- Use the jack to lift the truck. Place jack stands under the truck for extra support.
- Disconnect the truck’s battery to prevent any electrical issues during installation.
- Check for any signs of wear or damage on existing exhaust components that might affect the new setup.
- Make sure all parts for the new muffler or delete pipe are present. This includes clamps, screws, and hangers.
- Plan exhaust routing carefully to avoid contact with heat-sensitive parts of the truck.
Following these steps helps diesel truck owners set up their vehicles safely for custom exhaust setups, ensuring smoother installation of mufflers and delete pipes.
Step-by-Step Installation Process
The step-by-step installation process guides truck owners through removing old exhaust parts and putting in a new muffler or delete pipe. This part covers how to take off the old system, fit the new one correctly, and make sure all connections are tight and right.
Removing the Old Exhaust Components
Removing old exhaust components is the first step before installing a new muffler or delete pipe in a diesel truck. Diesel truck owners need to follow specific steps to ensure this process is done safely and effectively.
- Park the truck on a flat surface and use jack stands to lift it for better access.
- Wear safety glasses and gloves to protect against dirt and sharp edges.
- Locate the exhaust clamps that hold the system in place.
- Use a socket wrench or ratchet to loosen these clamps.
- Spray penetrating oil on bolts if they are rusted or stuck.
- Gently tap rusted bolts with a hammer to help break them free after applying oil.
- Carefully disconnect the exhaust pieces by sliding them apart.
- Check rubber hangers holding sections of the exhaust; remove these with an exhaust hanger removal tool.
- Keep all removed parts together in one place, so nothing gets lost.
- Inspect the area for any broken parts that may need replacing during installation of new components.
This methodical approach helps diesel truck owners take off old exhaust system parts without damage, making room for new updates like mufflers or delete pipes for better performance and sound.
Installing the Muffler or Delete Pipe
Setting up a muffler or delete pipe on a diesel truck transforms its sound and operation. This guide enables diesel truck owners to execute this procedure attentively and using the correct instruments.
- Position your truck on an even surface and switch off the engine. Ensure the vehicle is cooled down prior to initiating the work.
- Assemble all necessary implements, encompassing wrenches, sockets, and protective equipment like gloves and glasses.
- Elevate the truck with a jack and stabilize it with jack stands for safety.
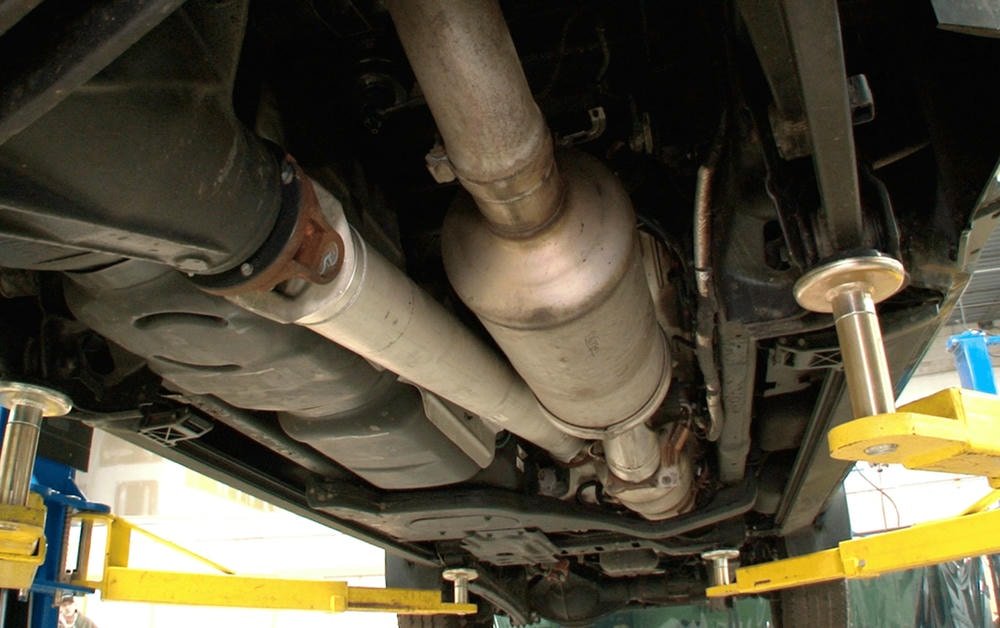
- Identify the old muffler or exhaust pipe section designated for removal.
- Employ a wrench to ease the clamps retaining the old muffler.
- With caution, disengage the old muffler from its slot by sliding it off the exhaust hangers.
- Contrast the new muffler or delete pipe dimensions with the old one to guarantee appropriate placement.
- Insert the new muffler in its spot, using lubricant if required for smoother installation onto hangers.
- Fasten any supplied components such as clamps or bolts to firmly stabilize the new part.
- Secure all links to avert leaks but refrain from excessive tightening, which can induce harm.
- Lower your truck safely from the jack stands and ignite the engine to inspect for any abnormal sounds or leaks.
Always ensure to reexamine every connection post-installation to validate everything is firm and well-aligned for the best performance and sound from your exhaust system upgrade.
Securing Connections and Clamps
Securing connections and clamps is essential in muffler and delete pipe installation. It’s a move that guarantees optimal exhaust flow and emission control in diesel trucks.
- Select clamps of appropriate size. They need to align with the diameter of your exhaust pipes.
- Slide the clamp over the pipe’s end before linking it with another section.
- Employ a wrench or socket set to tighten each clamp. Avoid excessive tightening, as it may harm the pipes.
- Ensure the exhaust sections are properly aligned. They need to be straight and firm.
- Mount hangers to bear the weight of the muffler or delete pipe. Ascertain they are securely connected to your truck’s frame.
- Once all components are linked, recheck each clamp’s security with the wrench or socket set.
- Initiate your diesel truck to verify the absence of leaks at the clamps by detecting any hissing sounds.
- Enlist the assistance of a friend to watch for irregular exhaust smoke as you increase the engine’s power slightly, indicating potential leaks.
These steps are derived from expert guidance on exhaust system installation, providing every diesel truck owner the means to attain ideal performance and sound from their vehicle while avoiding potential damage or safety hazards during the operation.
Adjusting for Proper Fitment and Alignment
Adjusting for proper fitment and alignment is crucial after installing a muffler or delete pipe on a diesel truck. This ensures the exhaust system works well and lasts long.
- Loosen clamps: Start by loosening the clamps on the exhaust system. This allows some movement to adjust parts for better alignment.
- Check alignment: Look at how the new part aligns with the rest of the exhaust. It should follow the same path as the old parts without touching other car parts.
- Adjust hangers: If the part hangs too low or touches something, adjust its hangers. This might need bending them slightly for better position.
- Use a level: Place a level tool across various points of the exhaust to ensure it’s straight. Adjust accordingly if any part tilts too much.
- Tighten clamps: Once everything lines up, tighten all clamps firmly but not too hard to avoid damaging pipes.
- Double-check clearance: Make sure there’s enough space around the exhaust and it doesn’t hit the ground or car body.
- Test drive: Drive your truck for a short distance, then recheck everything. Heat and movement can cause parts to shift.
- Listen for noises: During and after your test drive, listen for odd sounds which might mean something is loose or rubbing against another part.
These steps help diesel truck owners ensure their muffler or delete pipe is well fitted and aligned, leading to better performance of their vehicle’s exhaust system.
Post-Installation Considerations
After putting in a new muffler or delete pipe, drivers must check for any leaks. They should also test how the exhaust sounds and see if the truck’s performance has improved, fixing any problems they find.
Checking for Leaks
Checking for leaks is a vital step after muffler and delete pipe installation. One starts by turning on the diesel truck’s engine and letting it run. They listen closely for any sounds of hissing or escaping gas, signs of an exhaust leak.
Another way to check involves using a spray bottle filled with soapy water. They spray along the exhaust route, especially where parts connect. Bubbles forming show where leaks might be.
To fix these leaks, they tighten clamps or replace faulty gaskets as needed. Sometimes, welding may seal gaps permanently if clamps don’t work. It ensures the exhaust system works well and safely boosts performance.
Testing Exhaust Sound and Performance
After installing a new muffler or delete pipe, owners need to test the exhaust’s sound and performance. This step ensures the vehicle runs smoothly and sounds right. First, start the diesel truck and let it idle for a few minutes.
Listen closely for any odd noises that weren’t there before. Noises can mean leaks or loose parts in the exhaust system.
Next, take the truck for a short drive. Focus on how it feels and listen to the exhaust sound at different speeds. A well-installed muffler should improve engine performance and reduce noise levels compared to an old or damaged one.
If something seems off, like more smell from the exhaust or strange sounds, it might be time to double-check those connections.
Owners often use decibel meters or smartphone apps to measure sound changes before and after installations. These tools help confirm if the new setup meets local noise regulations while optimizing exhaust flow for better turbocharger integration.
Personal experience tells us that attention to detail during installation pays off in quieter rides and more efficient engines.
Addressing Any Installation Issues
Installing a muffler or delete pipe can improve a diesel truck’s exhaust flow and performance. Yet, owners might face some issues during installation.
- Check for leaks: After the installation, start the truck and listen for any sounds of leaks. Leaks often come from loose connections.
- Inspect all clamps and connections: Make sure every clamp and bolt is tight. Loose parts can cause rattles or a drop in performance.
- Ensure correct alignment: The new exhaust parts must align with the truck’s underbody properly. Poor alignment can lead to wear or damage.
- Listen to the exhaust sound: A change in the exhaust sound is normal after installing new parts. But, a very loud noise might mean there’s an issue.
- Monitor performance changes: Drive the truck to see how it performs. If there’s a decrease in power or efficiency, something might be wrong with the install.
- Seek expert advice if needed: Sometimes, it’s best to get help from someone with experience. They can spot problems that you might miss.
- Readjust if necessary: You may need to loosen, adjust, and then retighten components for perfect fitment.
- Use quality replacement parts: Always choose high-quality exhausts and clamps for lasting results.
Each step aims at making sure your diesel truck benefits from the new muffler or delete pipe without issues.
Conclusion
John Smith, an expert in auto repair with over 20 years of experience, weighs in on muffler and delete pipe installation. Smith has a degree from Tech Auto Institute and holds several patents related to exhaust systems.
He’s known for his work on making engines run cleaner and more efficiently.
Smith says the right installation of mufflers and delete pipes is key for diesel truck owners wanting better sound and performance. This task relies on tools like wrenches and skills like proper alignment.
These details ensure trucks meet emission standards while offering that deep rumble many drivers love.
Regarding safety, Smith highlights the importance of using eye protection and working in a well-ventilated area. Ethically, he advises following local laws about noise levels and emissions.
For transparency, he emphasizes honest advertising from manufacturers about what their products do.
For everyday use, Smith recommends regular checks for leaks or loose fittings post-installation to maintain optimal function. He compares this process favorably against professional installs regarding cost savings but reminds owners to weigh this against potential warranty issues.
In a balanced view, while these installations can boost performance slightly, they may not make huge changes in fuel efficiency as some claim. Users should think about why they want this upgrade against possible downsides like increased noise or legal issues with emissions controls removal.
Smith concludes by saying smart planning before installing mufflers or delete pipes pays off big time for diesel truck owners seeking that perfect sound without breaking any rules.
FAQs
What is the step-by-step process to install mufflers and delete pipes?
The installation of mufflers and delete pipes involves a detailed sequence of steps for exhaust flow optimization. This auto repair task starts with safely removing old components, then properly fitting new ones, ensuring all parts align correctly.
How does installing a new muffler and delete pipe impact my car’s performance?
A well-executed muffler and delete pipe installation can optimize your vehicle’s exhaust flow for improved motor function. It may increase engine efficiency, reduce noise, and even cut down on unpleasant odors from the exhaust system.
Are there any safety precautions to consider during the installation process?
Yes, safety is paramount in any auto repair job including when fitting mufflers and alternators or working on brakes or wiper systems. Always disconnect your car battery before starting work to prevent accidental shocks; use proper tools for each task; wear protective gear like gloves & eye protection; finally always ensure you’re working in a well-ventilated area especially while dealing with exhaust-related repairs.
Can I fit mufflers and delete pipes myself or should I seek professional help?
While it’s possible to follow an exhaustive guide for a DIY approach if you’re mechanically inclined, seeking assistance from an experienced individual ensures precision in execution as well as adherence to safety guidelines during this technical task.

